Thursday, September 12, 2013

Very quick Friendship card

Dimensions 5.50 by 4.25
Punched out 3 squares 1.50 by 1.50 in yellow card stock
Punched again white card stock at 1.25 by 1.25
Black card stock cut at 1.50 by 5.50
Ribbon
Glitter in flower center
Used stampin up stamp set called Best Wishes and More to stamp bird
Used stampin up stamp set Flower Shop to stamp flowers
Stamped out two flowers
Used punch to punch  two flowers
Stamped Friendship on white card stock base

Tuesday, September 10, 2013

My Peekaboo Halloween Card

Card Front
Card base is 5.50 by 4.25
Used pattern paper cut at 5.25 by 4.00
Added Ribbon
Used Holidays Cake Cartridge
Cut pumpkin at 1.00 by 6.00
Cut off one pumpkin
Used Christmas Cards Cartridge
Cut card out at 3.00 by 5.50
Used spellbinder die to cut out shape on front of card in white card stock
Size of White card stock is 2.00
Stamped boo on shape in black
Card open
Cut 2.00 by 2.00 square
Used stampin up stamp set called toxic treats for stamping
Hand colored red on pot
Glitter  bubbles coming out of pot


Monday, September 9, 2013

Tri-Fold Time card

 
Front of Card
Dimensions 4.25 by 10.00
Used Picturesque Cartridge
Embossed card front and inked over to bring out texture
 
Right side of card
Drew  out cut from front of card on to side
Cut clock face at 2.50
Used crackling  medium on clock face
Square out of brown card stock cut  at 3.75 by 2.50 
Stamped saying on  square brown  card stock and inked edges
All the way open
Saved cut from front to use in side of card
Cut two more clock at 2.50
Cut another brown square out of card stock
Size of brown card stock 2.00 by 1.75
Inked edges
Stampin up stamp set sense of time

Saturday, September 7, 2013

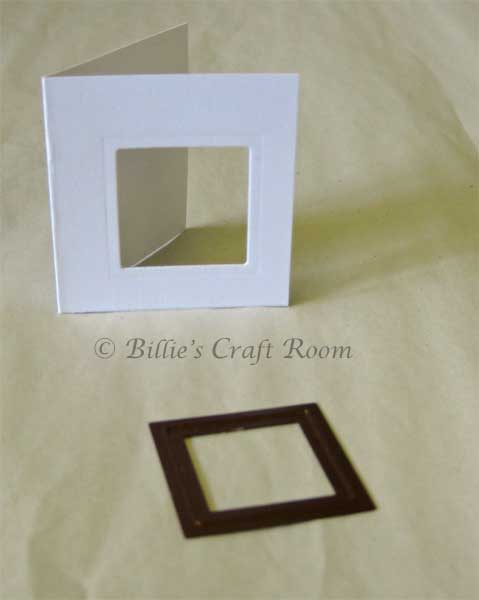
Here's the way to use magnetic sheets of paper for cutting with Cuttlebug

My recipe for using a magnetic mat for cutting apertures
  • A Plate
  • Embossing Mat
  • B Plate
  • Magnetic sheet
  • Nestabilities Die (Facing up so it doesn’t cut the magnet!)
  • Cardstock to be cut
  • B Plate.
To cut Apertures in your card
  • Select the die shape that will become your aperture and place it on the magnetic sheet
  • Place the magnetic sheet into your chosen base card
  • Arrange the die on the sheet to the area you wish to have an aperture
  • Carefully place this onto the Cuttlebug and put the B plate on top.
  • Wind the handle on the Cuttlebug to cut the apertures.
Cutting an aperture Card Part 1
The picture shows the ‘sandwich’ before the card is closed and the B plate added.
Aperture Card Part 2
Here is the resulting card. 
Hope this helps you out if you are new to the Cuttlebug or are looking for new ways to get more from your supplies.
www.billiescraftroom.worldpress.com


Make a Wish Pop Up Card

Front of Card
Dimensions 5.50 by 4.25
White card stock cut at 5.50 by 4.25 and embossed
Use Everyday Pop up Cartridge
Cake  cut at 3.00 and all layers
Embossed the cake layers
Inked over layers
Added lace to bottom of cake
In side of card
Cut saying at 4.00
Used everyday pop up cartridge
Hand colored candles on birthday
Used Stretch your Imagination cartridge
Cut 3 balloons at 2.50 and layers
Inked edges of balloons
Stamped saying in circle
Circle was punched out

Friday, September 6, 2013

Autumn Harvest Card

Dimensions 5.50 by 4.25
Pattern paper cut at 5.25 by 4.00
Used Holiday Cake Cartridge
Cut out fall circle  out  of orange card stock 4.00 and all layers out of brown card stock
Used Accent Essentials Cartridge
Cut brown card stock circle at 2.00
Cream card stock circle cut at 1.74
Stamped Harvest in center of cream card stock
Liquid pearls in white and red
Use vellum saying for autumn

Wednesday, September 4, 2013

A set of Cards


Dimensions 5.50 by 4.25
White card stock cut at 5.25 by 4.00
Embossed  white card stock
Used spellbinders die  used to cut shape fro center of card
Inked edges of shape
Used flower shop punch and stamped out flowers with  flowers shop stamp set
Glitter added to each flower in center
Stamped saying in center of shape
Liquid Pearls added to  shape in right corner