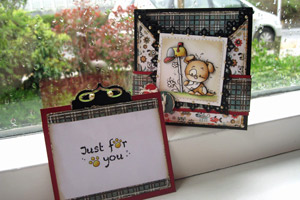
3D Paper Piecing
by Mariska van der Veer
Layer several stamped images to create a 3d look.
Supplies
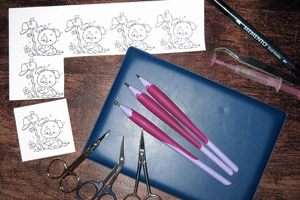
- Five stamped impressions or printed digital images close to each
other on the paper you usually color on, used here is one of the Naughty Puppies
by Wee Stamps
- One stamped impression or printed digital image cut into the shape
you want to use as a base
- Coloring Medium (markers, pencils, inks, etc.)
- Precision scissors or a craft knife
- Memento Dual Tip marker Tuxedo Black, or other black marker
- Pergamano embossing tools and mat
- Olba Glue kit with syringe, or other liquid glue
- Pair of Tweezers
Read more: http://www.splitcoaststampers.com/resources/tutorials/3dpaperpiecing/#ixzz2VYGo804T
- Five stamped impressions or printed digital images close to each
other on the paper you usually color on, used here is one of the Naughty Puppies
by Wee Stamps
- One stamped impression or printed digital image cut into the shape
you want to use as a base
- Coloring Medium (markers, pencils, inks, etc.)
- Precision scissors or a craft knife
- Memento Dual Tip marker Tuxedo Black, or other black marker
- Pergamano embossing tools and mat
- Olba Glue kit with syringe, or other liquid glue
- Pair of Tweezers
Step-by-Step
-
Step 1
Color every part of the image apart from each other.
Hint:
You can use several parts of one images but make sure that the different colored parts of the image don’t touch each other and have enough space between them to cut out later. In this picture for instance the body of the puppy is colored in one image and the back leg, that will go onto op the body as a layer, is colored in a second image.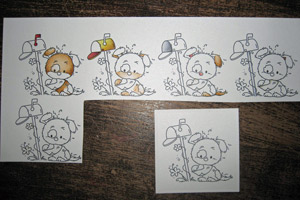
-
Step 2
Decide from every little piece that you have colored what adjoining piece is going to be the base for another piece.
For instance, in the matter of the body the back leg, the feet, the envelope and the head are going to be a higher layer then the body, so those parts are going to serve as a base to adhere these parts to. Color those base parts with a shadow color, used here is a W5 Copic Marker. Also color the part of the base image that is going to be paper pieced on.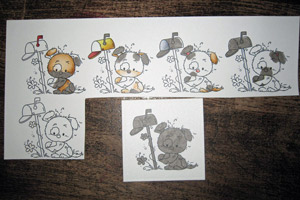
-
Step 3
Add shadow and background coloring to the base image when desired. Distressing or sewing on the base image should also be done at this point. You will not need the base part now until step 7.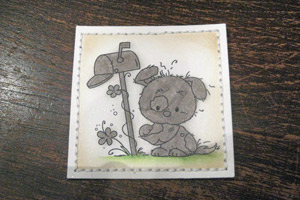
-
Step 4
Cut out all the pieces WITH the adjoining base parts that you have colored in a shadow color. You don’t need the base parts, just a good rim to add glue to will often do.
-

-
Step 5
Color the sides of the little pieces with the large tip of the Memento marker. Where there aren’t black lines (in this sample the back leg has party been cut without using black lines as a guide) don’t color the sides with the black marker.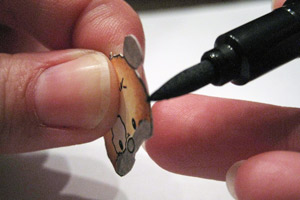
-
Step 6
Place the little pieces colored side facing down on the embossing mat, take an embossing tool that matches the size of the piece you are embossing, with the ball of that tool push down a little and go round in circles.
The little pieces should be slightly rounded on the colored side when you are ready. Be sure to not add to much pressure and be careful with very small pieces as they may jump away.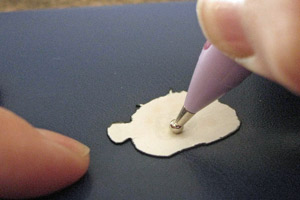
-
Step 7
Take a sheet of paper, place the base piece in the middle and all the little pieces in the order they are going to be placed on top of each other around it.
-
Step 8
Fill the syringe with glue and carefully decide which part of the image is going to be the most in the back of the image. Decide where the glue should go and carefully apply the glue.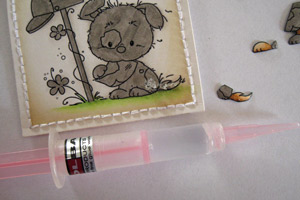
-
Step 9
Using tweezers put the colored piece on top of the glue. Make sure the glue supports the piece of paper but don’t press down on it, this will push the glue to the sides and will flatten the image. The glue is very strong and once set will hold the pieces of paper perfectly in place.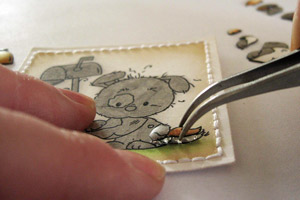
-
Step 10
Continue this process, each time carefully deciding which piece should be adding next and where the glue should go. If you by accident make a mistake the glue will stay flexible for a few minutes and the pieces can easily be removed.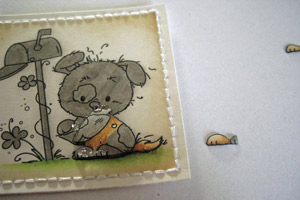
-
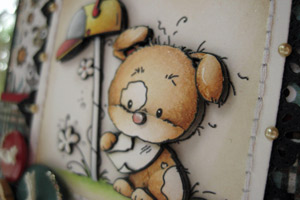
Step 11
The image is completely paper pieced. Looking from the side the image also looks good because of the shadow you have added to the base parts and the white sides of the pieces of paper that you have colored.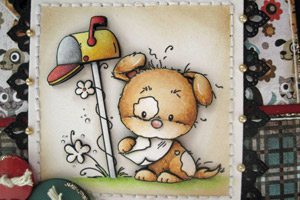
-
-
Step 12
Finish your project.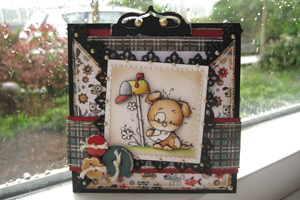
-
Used here is the Criss-Cross Card Tutorial altered measurements.
Video!
From Splitcoasterstampers.com
No comments:
Post a Comment