Wednesday, November 28, 2012

A-Frame Card


 Begin with an  8.25 by 11.00 sized piece of card stock. Cut the card stock in  half long ways so that you are left with two long strips. 

.

Now score and fold the card stock in half so that it resembles an A-Frame or a sandwich board.


This is my A Frame card
Dimensions 5.50 by 4.25

 Used Joys Of Seasons Cartridge to cut image at 3.00
Pattern paper cut at 3.75 by 4.25
Cut solid card stock 4.25 by 2.25
 Added trim and liquid pearls for dots
Stamped on card stock from Close to My heart stamp set

Monday, November 19, 2012

Using Background Stamps

Using Background Stamps

Background Stamp Tech Cust
Background sample cust
1]   With the background stamp face up, ink the stamp completely by tapping the ink pad on the rubber.
2]   Place the background stamp face up on your stamping surface.
3]   Place the card stock on the inked stamp.
4]   If the card stock is smaller than the stamp, cover the card stock with a piece of scratch paper.
5]   Rub the card stock with smooth, firm strokes, making sure to rub all areas of the stamp and to keep the card stock from sliding.
6]   Remove the scratch paper and carefully lift the card stock off the stamp.
QUICK TIP
Create a multicolored background by applying two or more inks to the background stamp.
  From Stampin up.com

Saturday, November 17, 2012

Gift Card Holder

Dimension are  7.75 by 4.75
 
 Score at  2.00 and score again  2.50
Fold over
Stamped  on green paper
Dark green square cut at 2.25 by 2.00
White square  cut at  1.75 by  1.75
Stamped on white square
Ripped  edges of green paper
 Ripped  dark green paper ( cut dark green  at 2.25 by 2.00)
Punched two small slits to hold gift card in place
Added ribbon on light green card stock to close
 

Tuesday, November 13, 2012

Star Fold Card


Star Fold Card

by Cindy Elam
Create a folded star or snowflake card.

Supplies

  • One 8 3/4" x 10" lightweight cardstock or Patterned paper

  • Ruler

  • Pen or pencil

  • Scoring Tool, Stampin’ Up! Simply Scored used here

  • Paper cutter

  • Bone folder

  • Embellishments, as desired

Step-by-Step

  1. Step 1

    Using the ruler and pen or pencil, make a mark in the middle of one 10" edge of paper (5" from each edge).
  2. Step 2

    Draw lines from the center mark down to each bottom corner.
  3. Step 3

    Align drawn line with groove of paper cutterand trim off excess. Repeat for other side.
  4. Step 4

    Align one straight edge of paper with left side of scoring tool. Score at 4 3/8" and 5 7/8". 
  5. Note:
    For sharp points on the star, move paper a scant 1/16th inch away from left side of scoring tool, as shown.

    Score the other two sides as you did for the first.
  6. Step 5

    Use bone folder to crease score lines – valley fold for the center score lines, and mountain fold for the points of the star.
  7. Step 6

    Fold in one side, then the next side, and tuck the last side under the first to close. Decorate as desired.
    From  Splitcoast  Stampers.com

Video!

Friday, November 9, 2012

Shaving Cream Cards


Shaving Cream

by Beate Johns
Use re-inker and shaving cream to get a wonderful smelling background.

Supplies

  • Shaving cream
  • 2-3 Dye ink pad re-inkers (Frayed Burlap and Spiced Marmelade Distress Reinkers used here)
  • Wooden stick
  • Container (Paper plate used here)
  • Cardstock
  • Paper towels
  • Stamps,The Cat's Pajama's Fright Nightused here

Step-by-Step

  1. Step 1

    Fill your container with shaving cream
  2. Use a wooden stick to smooth it out a bit.
  3. Step 2

    Add several drops of each of your re-inkercolors to your shaving cream.
  4. Step 3

    Mix shaving cream and re-inker in a swirling motion.

  5. Step 4

    Continue to mix until you like the design/swirls you see

  6. Step 5

    Press your cardstock into the shaving cream. Make sure the card front is completely coated.

  7. Step 6

    Pull cardstock out of the shaving cream.

  8. Step 7 (Optional)

    Lay another piece of cardstock on top of the one covered in shaving cream. Press together, then pull apart. giving you two shaving cream coated pieces of cardstock.


  9. This will give you two shaving cream coated pieces of cardstock.
  10. Step 8

    Take a paper towel and wipe away the shaving cream in a swirling motion.


  11. Step 9

    Let dry.


  12. Step 10

    Finish your card. Either layer an image on top or stamp directly onto the background.

     From Split coast stampers

Video!


Monday, November 5, 2012

Hello Kitty Brithday Day

Dimensions 5.50 by 4.25
Back ground paper 5.50 by 4.25
Hello Kitty Cartridge used all cut at 4.00
Glitter Glue
Gemstone
Sequins in red and white
Stamped Saying inside heart
 Eyes were added

Friday, November 2, 2012

Pulling Chalk Technigue

Pulling Chalk Technique

Good Friday morning to all of you!
I can't beleive how fast this week has gone, and that summer is officially over.
Our first day of fall here in Alberta, brought record breaking ot day!
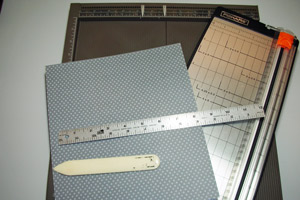
Well what was up to this morning, oh yes I was here in my craft room at 3:02am!
here's what I played with!
Began with hundsume hunter cark stock
More Chalk...............
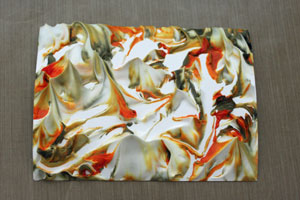
I am going to attempt to do the tehcnique called "Pulling Chalk"
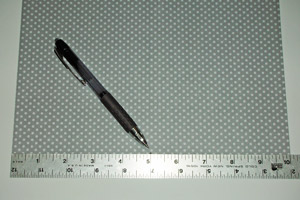
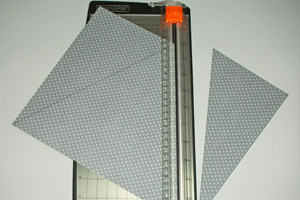
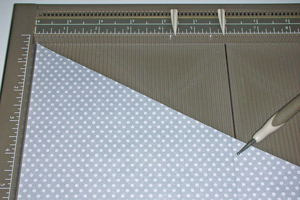
I started with handsome hunter card stock
Cut sponge
I wanted to try using sponge pieces instead of dabbers. It made more sense in my head then in real life! LOL :)

Chalk on so
it seems that the sponge held the chalk, and it did not go on very well.
Decided to try the dabbers

Chalk with dabbers
that seems to be better!

Continud onto versamark
the next step, is applying versa mark to the stamp, this is the part that pulls the chalk! you'll see!

Continued with versamark - stamped
you can see that it took away the chalk, where the stamp loaded with versa mark went.
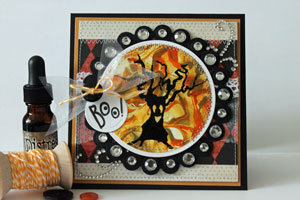
Now in the video that I watched, at this point they were done.

But............ by now you much know that I wasnt! LOL:)
I wanted to emboss
Embossed and outlined
I also outline the edge with a stampin write marker
Difficult choices
oh my.................
I am stuck now............
Renee!!!! Renee!!!!! where are you chikie, I need your help!
Ahw................
colour advise from my daughter, just what I needed
Pink maybe
pink>> maybe?
Pulling chalk technique 041
it's coming along right???
Whow it's done pulling chalk card
here we go! I actually did it.
Chalks, have always been such a difficult task fo rme, I am just not sure why.
So I am just real happy to have this another card made for the chalk challenge
Whow the details
well this is it!
hope you enjoyed my version of Pulling Chalk