Wednesday, April 30, 2014

Mother Day Shaped Tea Pot Card

 
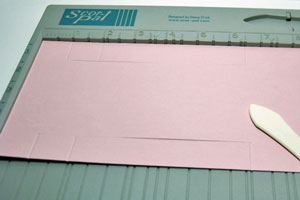
Dimensions are 6.00 by 5.00
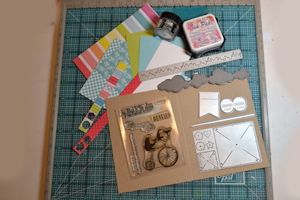
Used free card front tea pot file from www.birdscards.com
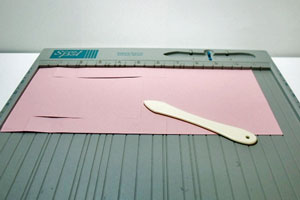
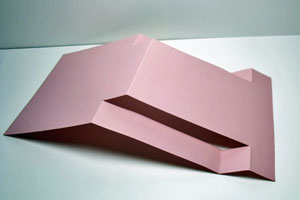
Made my own card shape file
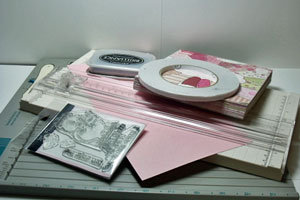
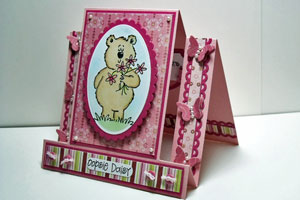
Used pink card stock to go behind rose cut out
Green card stock used to make leafs show up
Pink card stock used to make separation between lid and pot
Embossed tea pot
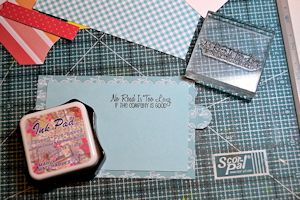
Stamped on top of lid thinking of you in black ink
Liquid pearls in flower centers and on top of Pearl
Glitter


Friday, April 25, 2014

How to do Pull-Tab Slider Card

Pull-Tab Slider Card

by Julie Masse


Pull a sliding tab to animate your card and reveal a message.

Supplies

  • Cardstock
  • Ink
  • Stamps – a focal image and sentiment stamp(s) (TCP Besties clear set used here)
  • Slot and circle dies, or ruler and craft knife (TCP CutUps Slider die set used here)
  • Adhesive (Glue Dots and foam dimensionals used here)
  • Other stamps, dies and embellishments as needed to complete the project

Step-by-Step

  1. Step 1

    To prepare the sliding panel, cut cardstock to 3.25" x 5". Die cut a pull tab from cardstock, then fold the piece in half and adhere the open side to the edge of the panel. Stamp a sentiment on the panel if desired.

    Note:
    To create a pull tab with a small circle die, fold a small piece of cardstock in half. Position the die so one side slightly overlaps the fold. Cut as usual.
  2. Step 2

    Cut a slider slot in the card front. The slot for the sample is approximately 1/4" wide by 3.75" long. The cut can be horizontal or vertical.

    Hint:
    If using a die, use a bit of low-tack tape to hold it in place for cutting. If you don't have a die, cut the slot with a craft knife.
  3. Step 3

    Die cut another tab from cardstock. Run a line of adhesive up the center, and fold the tab in half to align the circles. Fold across, then turn the sides back to form an “I” shape.
  4. Step 4

    Stamp, color, and cut out the focal image of the card. Adhere one side of the tab to the back of the image using a glue dot.

    Note:
    Be sure that the center of the slider tab is oriented to the direction in which the image should slide.
  5. Fold the other side of the tab in to insert it through the slot. Lay the tabs flat.


  6. Step 5

    Align the slider and sentiment panels, and adhere the back of the slider tab to the sentiment panel.
  7. You will now be able to slide the image back and forth using the pull tab.
  8. Step 6

    Add foam dimensional adhesive to the back of the card front around 3 sides of the sentiment panel, leaving the end with the tab free of adhesive.
  9. Step 7

    Adhere the panels to the card base. Embellish as desired to complete the card.


Video!


From www.splitcoaststampers.com


Thursday, April 24, 2014

A friend card


 Dimensions 7.00 by 5.50
Card front from www.birdscards.com
 Free file
Embossed white card stock
Glitter mist spray 
Ribbon in pink
Stampin stamp set called Nature Sketchbook for saying on card
Liquid Pearls in pink


Saturday, April 19, 2014

Bunny Boxes


Dimension 8.00 by 2.00
I got this file from Make The Cut Form Group
It was a free file share
Name of  file is Tag Top lindt bunny holder
It is made to hold small chocolate
I got the scallop file from Make The Cut gallery
I changed the size 1.25 by 1.25
Stampin up stamp set called Vintage Labels
 Stamped  For You in center of scallops
Liquid Pearls a round scallops
Used stampin up small flower punch
Punched out 4 flowers
Added pearls to flower centers


Thursday, April 17, 2014

Egg Easel Cards

 Dimensions 4.50 by 8.00
 I bought from www.letteringdelights.com
File I bought is called Cut flowers Easter Eggs
I changed the file so I could make easel cards
I used Make The Cut program
Hand colored all the cut outs
Used marker and  chalk
Liquid pearls
Glitter
 Used stampin up Label Bracket Punch
Punched out one in light purple and cut in half
Punched out another one in white and inked edges in  darker shade of purple
Used stampin up stamp set called Heaven Blessed

Wednesday, April 16, 2014

Circle Of Butterflies Card


Dimensions 5.50 by 5.50
I used svg file  found  on the net to make the card
Added  patterned card stock to put behind butterflies
Pop dotted each yellow butterfly
Embossed each butterfly
Liquid Pearls
Pearls a round circle and butterflies
Glitter on petite flowers
Used stampin up petite petals stamp set and punch
Punched out flowers after stamping
Used stampin up stamp set  called Blooming with Kindness
For greeting on card in center of circle


Sunday, April 13, 2014

Dove Easter Egg Holders

 
Dimensions 2.50 by 6.00
Svg  Dove file came from make the cut form group
I cut 5 out  of 12 by 12 sheet card stock
Embossed the doves
Eyes added
Put hollow chocolate eggs in each dove
Fun Easter Table decoration or gift for someone

Thursday, April 10, 2014

Tool Box Gift Holder

 
Dimensions 5..25 by 5.00
Added  dimensional by k&Company for tool
Cut file from www.crea8ivecuts.com
Makes a great way to hide gift card


Toolbox


Assembly Instructions
From crea8ive cuts
 
1. Open the Toolbox file in your cutting software and cut pieces from the cardstock of your choice, or print the Scissor Cutz pdf files on the cardstock of your choice and cut with scissors or a craft knife. All pieces are shown and labelled in the diagram on the right.

2. Score / fold all pieces indicated in the diagram.

3. To form the bottom of the toolbox, fold the bottom sides, front and back up, tuck the side tabs inside and glue in place as shown in Photo 1.

4. To form the top of the toolbox, fold the top sides, front and back down, tuck the tabs in and glue in place as shown in Photo 2.

5. Insert the Toolbox Handle through the small slits in the lid and pull through to the inside until the

handle is the desired length. Glue the handle ends down on the inside without creasing as shown in Photo 3.

6. Attach the buckles to the top front of the tool box, aligning the lower edge of the toolbox top with the middle of the buckle. Glue in place or use an eyelet as shown in Photo 4. Adhere small velcro dots to the bottom inside of the buckles and the top edge of the toolbox bottom to hold the toolbox shut.

7. Fold the Tray Shelf to form a small open box (like a matchbox cover), with the last narrow tab tucked inside, glue in place as shown in Photo 5.

8. Glue one tray shelf to each end of the toolbox on the inside as shown in Photo 6.


9. Fold the sides of the tray up, tuck the tabs to the inside and glue.

10. Fold the sides of the tray handle down and glue to the inside of the tray sides as shown in Photo 7.


Fishing Jacket Card

 
Gate Fold Card
 Dimensions 10.50 by 5.50
Free cut file from  www.svgcuts.com
 Stamped out fishing items and fuzzy cut out
Embossed jacket
Hand colored layers
Drew stitch lined
Glitter

Blessed Step Card and how to make your own

 
 Dimension are 5.50 by 5.50
Used Make The Cut Program to cut step base of card
Cut out ribbon broader and ran ribbon in pink threw it
Ribbon boarder cut file from  www.bridcards.com
Embossed pink card stock using Ann Griffins  lace folder
Used stampin up stamp set called Blessed Easter
Stamped out two of the image
Fuzzy cut out flowers
Pop dotted up flowers
Hand colored flowers with markers
Glitter added to flowers


Center Step Card

by Frances Byrne
 

Supplies

  • One 5 1/2" x 11" piece of cardstock for card base
  • Scor-Pal™, or other scoring tool
  • Paper trimmer
  • Adhesive
  • Stamps
  • Ink
  • Additional cardstock, pattern paper and embellishments for decoration

Step-by-Step

  1. Step 1

    Line cardstock up in paper trimmer so that the edge of the card is at the 1" mark. Position the cutting blade at 1" and cut from 1" to 6.5".
  2. Flip card over and do the same on the other side.
  3. Step 2

    Place cardstock onto scoring tool and score along the long side of the card from the edge to the cut line at 1", 2" and 6.5".
  4. Step 3

    Repeat step 3 on opposite edge of card.
  5. Step 4

    Score between cut lines at 5 1/2".
  6. Step 5

    Fold at the score lines. The first, third and center score lines are mountain folds. The second score line is a valley fold. Reinforce score lines to make folds crisp.

  7. Step 6

    Stamp and decorate your card as desired.
From Spilt coaster stampers


Monday, April 7, 2014

Thinking of you

 
Dimensions are 5.50 by 4.25
 Three  fold card with butterfly on edges
 Card file  svg  was free from www.quillingpatch.com
I cut the card out two times
Once in white card stock
Then cut again in rose card stock
Added liquid Pearls on butterfly and in center of roses
Made a band to make card close
Punched out oval to stamp greeting on
Used a svg file  that I  made to on top off  oval
Hand colored to match the card stock


Tuesday, April 1, 2014

Butterfly Easel Card


Dimension 10.00 by 5.50
Free cut file from www.birdscards.com
Used liquid Pearls in pink on butterfly
Used stampin up  Label Bracket Punch
Punched out label in white
Inked edges in pink
Stamped saying on label
Punched out flowers with stampin up small flower punch
Punched out two and added pearls to center of flower