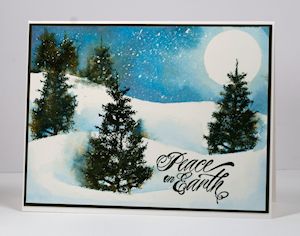
Saturday, December 6, 2014

How to do Masking to make a card

Falling Snow Scene

From Spilt Coast Stampers
by Heather Telford


Use inks, masks and masking fluid to create a snowy scene.
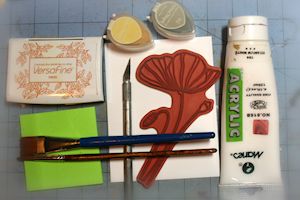
Supplies

  • Dye inks (Memento Northern Pine, Nautical Blue and Bahama Blue used here) or other watercoloring medium
  • Paint brush
  • Watercolor paper (Fabriano hot press watercolour block used here)
  • Splatter brush or old toothbrush
  • Masking fluid
  • Mister bottle filled with water
  • Painter's tape
  • Tree stamps in varying sizes (Penny Black “Prancers” transparent stamp set used here)
  • Other supplies as needed to complete the project (Penny Black “Hello Winter” transparent stamp set)

Step-by-Step

  1. Step 1

    Splatter masking fluid over watercolor paper with a splatter brush or tooth brush. Leave to dry.
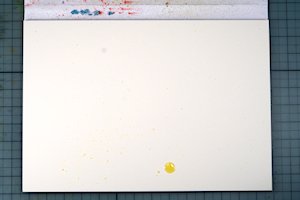
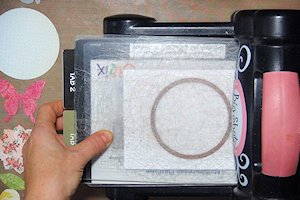
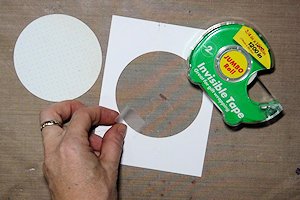
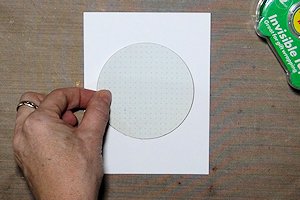
  2. Step 2

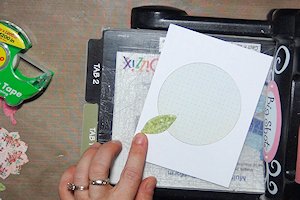
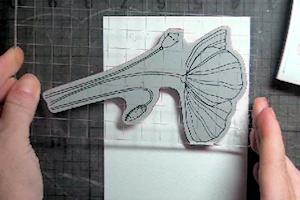
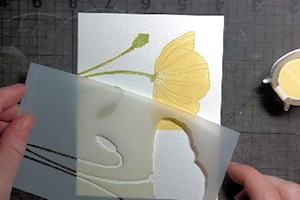
    Use painter's tape to keep the panel in place and mask edges for stamping. Cut a hill-shaped mask and punch a circle mask from Post-it notes. Position masks on watercolor paper to expose the top third of the panel. This will be the sky area.
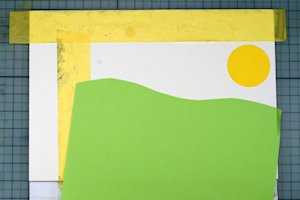
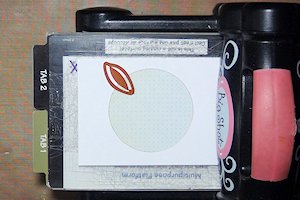
  3. Step 3

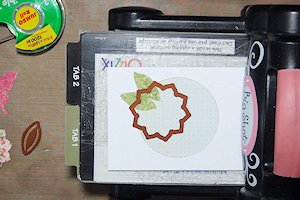
    Ink small tree stamp with dark green ink. Spritz stamp lightly with water and stamp twice over horizon. Ink stamp again, stamp, then spritz paper so color will bleed.
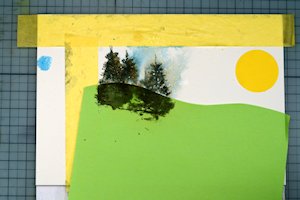
  4. Step 4

    Press blue inks onto an acrylic block to use as a palette. Add water with a paint brush and paint sky area. Add darker blue in areas away from the moon.
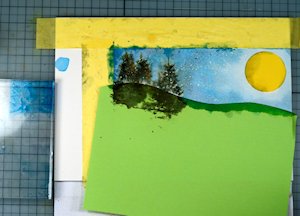
  5. Step 5

    Remove masks and throw away.
  6. Step 6

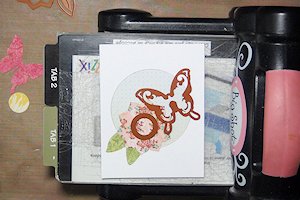
    Cut a new hill mask and position it halfway down the remaining white area. Ink medium sized tree and stamp twice. Spritz paper with water and remove mask.
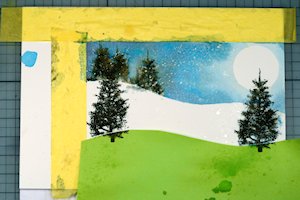
  7. Step 7

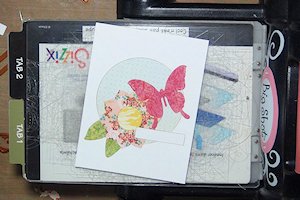
    Using diluted blue ink, paint a snow bank from one side of panel to the other. Stay in line with the base of the two medium sized trees. Rinse brush and use water to dilute and pull color from snow bank line upwards. Dab with cloth or paper towel to soften and dry the edge of pale blue ink.
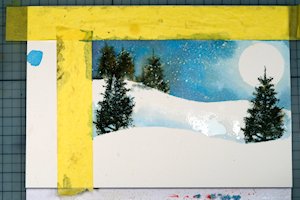
  8. Step 8

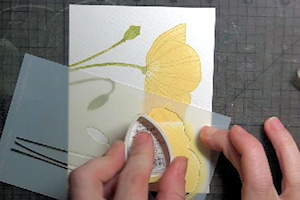
    Cut another Post-it note mask. Position it below previous snow bank and stamp large tree. Spritz with water to let ink bleed. Remove mask.
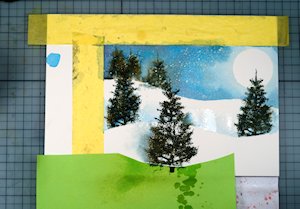
  9. Step 9

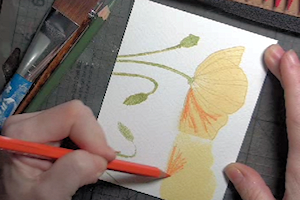
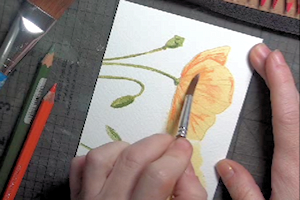
    To frame the scene, paint around lower borders of panel and dab with cloth to soften the edge. When the panel is completely dry, gently rub off the masking fluid to reveal the falling snow.
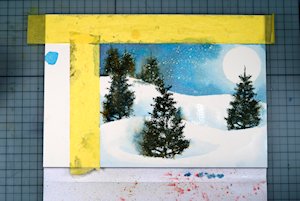
  10. Step 10

    Trim the panel and choose a color to mat it, then add a sentiment to complete the card.

Video!


Monday, October 27, 2014

Felted Cardstock


by Lydia Fiedler


From Spiltcoast Stampers.com


Use plastic wrap and a decorative napkin to create a cool background.

Supplies

  • Decorative paper party napkins
  • Plastic Wrap
  • Large Pad of Newsprint
  • Iron
  • White cardstock
  • Stamps
  • Ink
  • Adhesive
  • Scissors
  • Embellishments

Step-by-Step

  1. Step 1

    Separate printed layer of napkin from white layer.
  2. Step 2

    Open pad of newsprint to middle.

    Place white cardstock, plastic wrap and then napkin on newsprint with printed side of napkin facing up.

    Put two sheets of the newsprint on top of this sandwich.
  3. Step 3

    With your iron on the highest non-steam setting, begin ironing the sandwich, going over it evenly for a few minutes, making sure you iron the entire area.

    Let cool.
  4. Step 4

    While holding the napkin down with one hand, carefully remove the top two sheets of newsprint.

    Then slide your hand under the newsprint and pop the card up off the bottom newsprint.

    Check to be sure the napkin is fused to the cardstock everywhere - especially at the corners. If it's not, simply put the newsprint back down and continue ironing. You can do this as often as necessary.
  5. Step 5

    When the cardstock is felted, simply flip it over and trim off the excess napkin, and use the cardstock as you normally would.
  6. Step 6

    Finish your card.


Friday, October 17, 2014

Inlaid Die Cuts


by Dina Kowal
From Spilt coast stampers


Use multiple die cut shapes to create a one-layer inlaid scene or collage.

Supplies

  • Dies to create a design or scene (Spellbinders dies used here)
  • Die cutting machine
  • Cardstock for card base, and scraps of cardstock or patterned paper for die cutting
  • Tape
  • Glue
  • Other supplies as needed to complete the card

Step-by-Step

  1. Step 1

    Choose dies to create a scene or design.

    Cut out each die shape from coordinating cardstock.
  2. Step 2

    Create a plan for your design or scene. Lay the die cut pieces on your work surface as you would like them to appear on a finished card. For a more intricate scene or design, overlap the pieces.

    The scene will be created from back to front, beginning with the bottommost pieces in your arrangement.

    HINT:
    Make a diagram of your scene or design and number your die cut pieces to help remember placement. The images that will appear to be in the background of the scene or pattern will be cut first.
  3. Step 3

    Prepare a cardstock panel slightly smaller than your finished card size. Use the die from the first cut piece to cut an opening in the card base layer.
  4. Step 4

    Place a small piece of tape at the edge of the die cut opening. It is best to use strong tape rather than repositionable tape, since this will need to hold the die cut in place after the card is assembled.
  5. Replace the cut from the card base layer with the corresponding cardstock piece cut earlier. Add more tape as needed on the back side of the panel to keep the pieces together, especially in areas where more cuts will be made.

    NOTE:
    Take care when removing the die cut piece. Overlapping outlines may create small loose pieces that will need to be replaced into the panel and secured with tape from the back side of the panel.
  6. Step 5

    Position the corresponding die from the next layer onto the panel. Cut, and remove the die cut piece.
  7. Replace the cut piece with the cardstock piece cut earlier, using tape on the back side of the panel to keep the inlaid piece in place.
  8. Step 6

    Repeat the step above for as many pieces as you have remaining, each time filling in the opening with a die cut shape and securing with tape on the back.
  9. HINT:
    If dies in a single layer do not overlap, more than one shape can be cut at once to save time.
  10. Step 7

    Complete the inlaid design.
  11. Apply adhesive to the entire back of the panel, making sure there is adhesive on both sides of each cut line.

    Adhere the panel to a card base.
  12. Step 8

    Embellish and complete the card.


Monday, October 13, 2014

Upright Diamond Fold Card


by Laura Lipe
From Split Coast Stampers
Create a unique folded card.

Supplies

  • One 6 1/4" x 11" piece of cardstock, for card base
  • One 6" x 3 1/4" piece of patterned paper (pattern choice 1), for inside back
  • Two 6" x 1 1/4" pieces of patterned paper (1 ea. pattern choice 1 and 2)
  • Three 6" x 3 3/4" pieces of patterned paper (pattern choice 2)
  • Stamps, sentiments and dies to decorate card
  • Paper Cutter
  • Scoring tool
  • Pencil
  • Ruler
  • Bone folder
  • Die cutting machine
  • Adhesive

Step-by-Step

  1. Step 1

    Score the 6 1/4" x 11" piece of cardstock at 4", 6" and 7 1/2" on long edge. Fold these mountain, mountain, valley folds.
  2. Step 2

    Make a pencil “tick mark” on long edge of cardstock at 2" (from left edge) at top and bottom. Make a “tick mark” on only the left short side at 3 1/8".
  3. Step 3

    Score from the 2" tick mark at top to the 6" score on the bottom. Score from the 6" score on the top to the 2" tick mark on the bottom. This will make an "X". Fold both sides of the "X" as valley folds.

  4. Step 4

    Prefold your score lines. Your card base should look like this.
  5. Step 5

    Cut from the 2" tick mark at the top to the 3 1/8" tick mark on the left edge of the card. Cut from the 3 1/8" tick mark on the left edge to the 2" tick mark at the bottom. This will make a shape like the left side of a "diamond" Now you can fold up the card and you will have a shape like a diamond almost in the center of the card but a bit to the left. You are ready to decorate your card.
  6. Fold up the card and you will have a shape like a diamond almost in the center of the card but a bit to the left. You are ready to decorate your card.
  7. Step 6

    Glue the 6" x 3 1/4" patterend paper, (pattern choice 1) to the inside back of the card. Glue the two strips of 6" x 1 1/4" patterned paper (pattern choice 1 and 2) to the inside straight area, and on the front on the straight area.

  8. Step 7

    Make tick marks on each of the 6" x 3 3/4' patterned papers at 1 7/8" at top and bottom and at 3" on each side. Cut all three from the 1 7/8" mark to the 3" marks and from the 3" marks up to the 1 7/8" marks, creating 3 diamond shapes. One of these will go on the front and one inside the front.

  9. Step 8

    The third one you will cut in half from top to bottom, and those two pieces will be used on the front and inside the front.
  10. Step 9

    Take those little triangles you cut off the designer paper in Step 7, and trim 1/8" off the bottom of each one. These will be used to cover the small triangles on the front and inside the front.

  11. Step 10

    Decorate the card as desired.

Video!


Stencil Reflection

Stencil Reflection

by Dina Kowal
From Split Coast Stampers


Use a stencil or reverse mask to create a watery reflected image.

Supplies

  • Stamps (Penny Black Poppy Time used here)
  • Waterproof ink for stamping (Versafine Toffee Ink used here)
  • Water soluble coloring medium (Versamagic Chalk Inks and Faber-Castell Albrecht Durer watercolor pencils used here)
  • Coordinating stencil or die cut, or paper and craft knife to cut a reverse mask (Penny Black Sun Catcher stencil used here)
  • Paper or sticky notes for masking
  • Watercolor paper
  • Paint brushes, one broad flat brush and a smaller one for detail
  • White acrylic paint (optional)
  • Other supplies as needed to complete the card

Step-by-Step

  1. Step 1

    Cut watercolor paper to desired size. Determine the position of the rubber stamp image that will be reflected in your stamped scene.
  2. Mask a horizontal line using sticky notes or paper where the reflection will begin, representing the surface of the water.
  3. Step 2

    Stamp the image using waterproof ink. A lighter ink was used in the sample so the outline of the image was more faint. Experiment with different looks and shades of ink to find the look you like best.

    TIP:
    If you want the image to reflect in the water as if it were completely above water, stamp above the masked line. If you want it to appear to be sitting in or dipping into the water, allow the stamp image to overlap the masked line.
  4. Step 3

    Cut a reverse mask from acetate or text weight paper, or use a coordinating stencil or die cut as a reverse mask.

    (For a complete tutorial on Reverse Masking, click HERE.)

  5. Give the stamped image a base layer of color using a water soluble medium, such as chalk or dye ink, Distress inks, watercolor pencils, or Gelatos. If desired, use the reverse mask to cover up the areas around the image as you color. Apply color directly with an inkpad, or use a sponge, dauber or brush.

    Layer color as desired for shading. Clean or dry the mask or stencil before moving on to the next step.
  6. Step 4

    Remove the horizontal mask but keep a mental note of where it was positioned. Flip the stencil over and position it so that it is at equal distance and opposite angles to the stamped image in relation to the horizontal line.

    TIP:

    If the stamped image crossed the horizontal line, find the point on the mask or stencil where the width of the opening is the same.
  7. Step 5

    Add color through the stencil openings to create the reflected image.
  8. Layer color as desired for shading.

    NOTE:
    When adding shading, remember that the reflection is a mirror image and angles and positions will be opposite. For example, if you shaded toward the bottom on the stamped image, the shading on the reflection will curve the opposite way toward the top.
  9. Step 6

    Blend coloring using a wet paint brush. When blending the colors on the stamped image, take care to stay within the outlines.
  10. When blending the colors on the reflected image, use a wide flat brush and brush with a side-to-side motion to simulate ripples and reflection on the surface of the water. Don’t worry about staying in the lines.

    To create an illusion of depth, pull a little color from the lower part of panel up around the stamped image above the horizontal line. This makes it look like there is water behind the object being reflected.
  11. Step 7

    Add deeper shading to the colored images if desired.
  12. On the reflection, shading can be added in horizontal strokes.

    Blend from side to side as before, using a smaller brush so more detail is left.
  13. Step 8

    For an added water effect, dilute white acrylic paint with water and brush thin horizontal lines over the reflected image.
  14. The white paint can also be used to add highlights to the stamped image.
  15. Step 9

    Use the panel to complete a card or other project.

Video!