Partial Die Cutting
by Debby Hughes
Extend a portion of a die cut shape past the fold for a unique card or place
marker.
Supplies
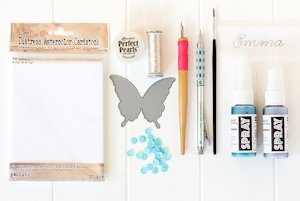
- Sturdy cardstock or watercolor paper (Distress Watercolor Cardstock used here)
- Steel wafer die (Simon Says Stamp Paulina Butterfly Die used here)
- Die cutting machine, cutting and embossing plates
- Pencil
- Ruler
- Scoring tool
- Other supplies as needed to complete the project (Spray Inks from Hero Arts, paintbrush, calligraphy pen, silver thread, Perfect Pearls, and Studio Calico Sequins used here)
Step-by-Step
-
Step 1
For a place card, cut card base to 5 1/2" x 4 1/4". Mark a pencil line across the card at 2 3/4".
For a standard-sized card, cut base to 8 1/2" x 4 1/4". Mark a pencil line across the card at 4 1/4" and at 5 1/2".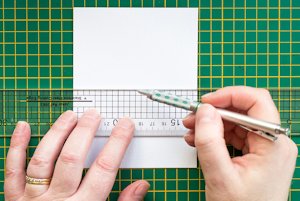
-
Step 2
Place a shaped die so that one part of the die is above the center pencil line and the rest is below.
For the standard sized card, position the die so that it does not go above the line at 5 1/2".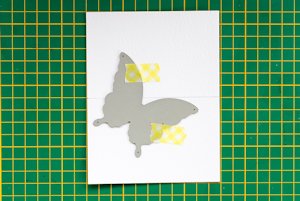
-
Step 3
Line up die cutting plates along the pencil line so that only the protruding portion is cut when run through the die cutting machine.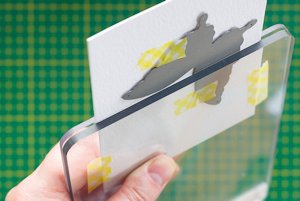
-
Step 4
Line up die cutting plates along the pencil line so that the rest of the die is encased between the plates. Run through the die cutter with an embossing mat to impress the die into the card.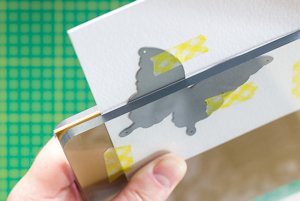
-
Step 5
The card now has a die cut element, with the rest of the die impressed into the card.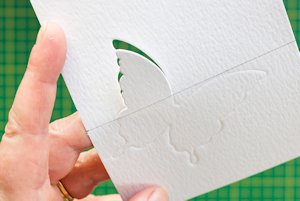
-
Step 6
Score along the pencil line, outside the die cut area. Erase pencil markings.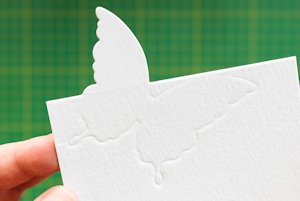
-
Step 7
Decorate the card as desired.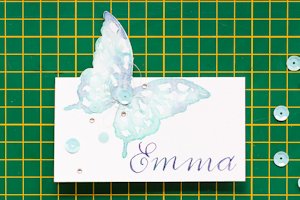
From spiltcoast stampers.com
You've seen the tutorial, now you try it! We've got a section of the gallery
set aside for Partial Die
Cutting. Try this technique, then upload your artwork to the
gallery. Show us your creations!
No comments:
Post a Comment