Colored Dry Embossing
by Jeanne Jachna
From Spiltcoast stampers.com
Learn tips for using inks to enhance dry embossed designs.
Supplies
- White cardstock or smooth watercolor paper
- Embossing folder (Anna Griffin Aviary by Cuttlebug used here)
- Die cutting/ embossing machine
- Coloring medium (Ranger Distress Inks used here)
- Paper stumps or a blender pen
- Other supplies as needed to complete the card
Step-by-Step
-
Step 1
Trim a piece of white card stock to 4.25" x 5.5" and emboss with an embossing folder according to your machine's instructions.
-
Step 2
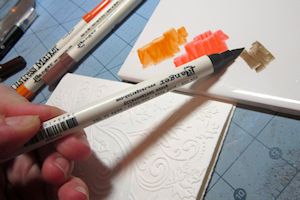
Apply the flat side of the tip of a paper blending stump to an ink pad to lift color. Begin with a lighter shade as a base coat of color, then use a darker color to add shading and depth if desired. For fine areas (like the stems here) use the very tip of the nib.
TIP:
Hold the blending stump further back to give the flat side of the tip a better angle for coloring the raised areas.
-
Step 3
To switch colors use a different paper stump or the opposite end. If you want to use the same paper stump, sand the end down to a fresh point. (See video for tips on cleaning and sharpening stumps.)
-
Step 4
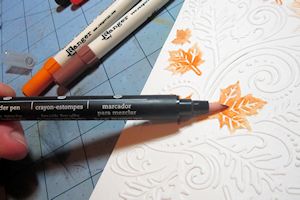
Work across the entire image until coloring is complete.
-
Step 5
Trim the panel to fit your card base and complete the card.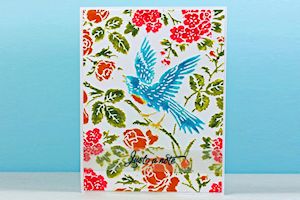
Video!
Variations
-
For a watercolored look, create a palette using dye inks or water-based markers. Chalks or PanPastels can also be used.
-
Use a blender pen to lift and apply color to the embossed images (Stampin' Up! Blender Pen used here).
Thanks for the tutorial. This shows me a new way to use my embossing folders.
ReplyDelete