Stencil Reflection
by Dina Kowal
From Split Coast Stampers
Use a stencil or reverse mask to create a watery reflected image.
Supplies
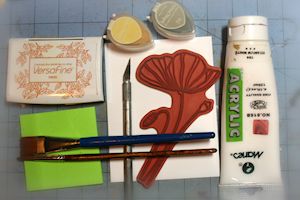
- Stamps (Penny Black Poppy Time used here)
- Waterproof ink for stamping (Versafine Toffee Ink used here)
- Water soluble coloring medium (Versamagic Chalk Inks and Faber-Castell Albrecht Durer watercolor pencils used here)
- Coordinating stencil or die cut, or paper and craft knife to cut a reverse mask (Penny Black Sun Catcher stencil used here)
- Paper or sticky notes for masking
- Watercolor paper
- Paint brushes, one broad flat brush and a smaller one for detail
- White acrylic paint (optional)
- Other supplies as needed to complete the card
Step-by-Step
-
Step 1
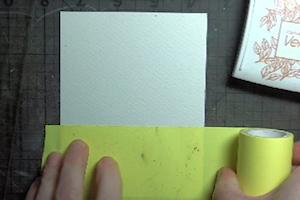
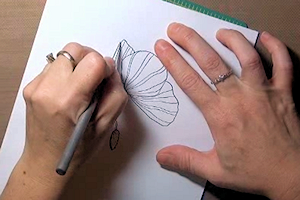
Cut watercolor paper to desired size. Determine the position of the rubber stamp image that will be reflected in your stamped scene.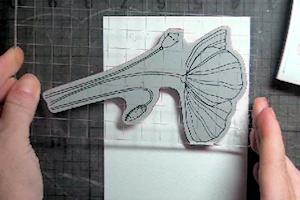
-
Mask a horizontal line using sticky notes or paper where the reflection will begin, representing the surface of the water.
-
Step 2
Stamp the image using waterproof ink. A lighter ink was used in the sample so the outline of the image was more faint. Experiment with different looks and shades of ink to find the look you like best.
TIP:
If you want the image to reflect in the water as if it were completely above water, stamp above the masked line. If you want it to appear to be sitting in or dipping into the water, allow the stamp image to overlap the masked line.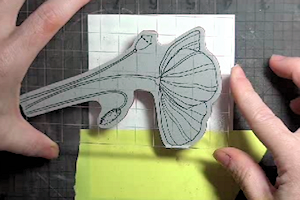
-
Step 3
Cut a reverse mask from acetate or text weight paper, or use a coordinating stencil or die cut as a reverse mask.
(For a complete tutorial on Reverse Masking, click HERE.)
-
Give the stamped image a base layer of color using a water soluble medium, such as chalk or dye ink, Distress inks, watercolor pencils, or Gelatos. If desired, use the reverse mask to cover up the areas around the image as you color. Apply color directly with an inkpad, or use a sponge, dauber or brush.
Layer color as desired for shading. Clean or dry the mask or stencil before moving on to the next step.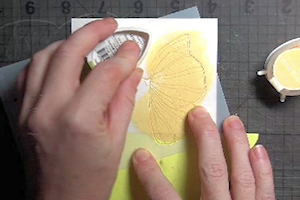
-
Step 4
Remove the horizontal mask but keep a mental note of where it was positioned. Flip the stencil over and position it so that it is at equal distance and opposite angles to the stamped image in relation to the horizontal line.
TIP:
If the stamped image crossed the horizontal line, find the point on the mask or stencil where the width of the opening is the same.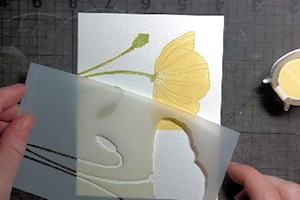
-
Step 5
Add color through the stencil openings to create the reflected image.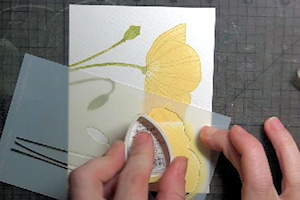
-
Layer color as desired for shading.
NOTE:
When adding shading, remember that the reflection is a mirror image and angles and positions will be opposite. For example, if you shaded toward the bottom on the stamped image, the shading on the reflection will curve the opposite way toward the top.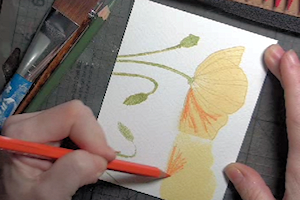
-
Step 6
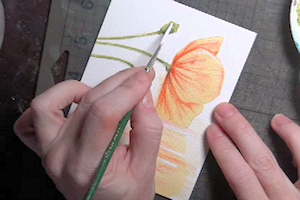
Blend coloring using a wet paint brush. When blending the colors on the stamped image, take care to stay within the outlines.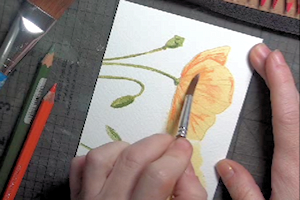
-
When blending the colors on the reflected image, use a wide flat brush and brush with a side-to-side motion to simulate ripples and reflection on the surface of the water. Don’t worry about staying in the lines.
To create an illusion of depth, pull a little color from the lower part of panel up around the stamped image above the horizontal line. This makes it look like there is water behind the object being reflected.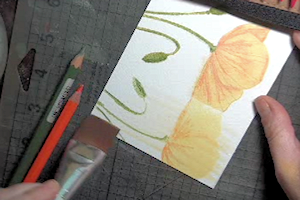
-
Step 7
Add deeper shading to the colored images if desired.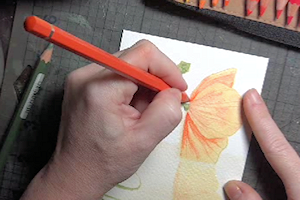
-
On the reflection, shading can be added in horizontal strokes.
Blend from side to side as before, using a smaller brush so more detail is left.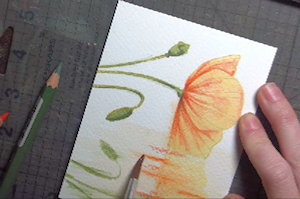
-
Step 8
For an added water effect, dilute white acrylic paint with water and brush thin horizontal lines over the reflected image.
-
The white paint can also be used to add highlights to the stamped image.
-
Step 9
Use the panel to complete a card or other project.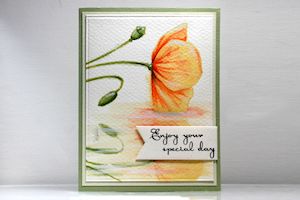
No comments:
Post a Comment