by Dina Kowal
From Spilt coast stampers
Use multiple die cut shapes to create a one-layer inlaid scene or
collage.
Supplies
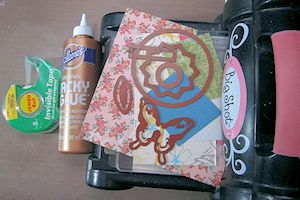
- Dies to create a design or scene (Spellbinders dies used here)
- Die cutting machine
- Cardstock for card base, and scraps of cardstock or patterned paper for die cutting
- Tape
- Glue
- Other supplies as needed to complete the card
Step-by-Step
-
Step 1
Choose dies to create a scene or design.
Cut out each die shape from coordinating cardstock.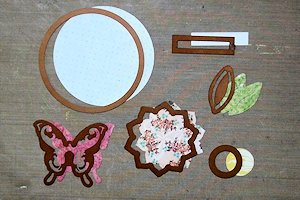
-
Step 2
Create a plan for your design or scene. Lay the die cut pieces on your work surface as you would like them to appear on a finished card. For a more intricate scene or design, overlap the pieces.
The scene will be created from back to front, beginning with the bottommost pieces in your arrangement.
HINT:
Make a diagram of your scene or design and number your die cut pieces to help remember placement. The images that will appear to be in the background of the scene or pattern will be cut first.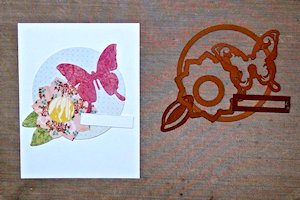
-
Step 3
Prepare a cardstock panel slightly smaller than your finished card size. Use the die from the first cut piece to cut an opening in the card base layer.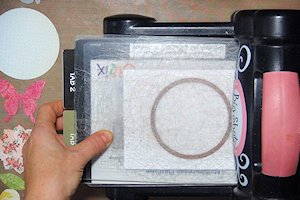
-
Step 4
Place a small piece of tape at the edge of the die cut opening. It is best to use strong tape rather than repositionable tape, since this will need to hold the die cut in place after the card is assembled.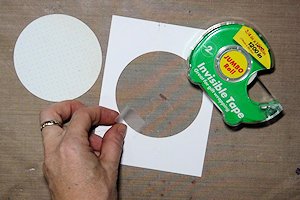
-
Replace the cut from the card base layer with the corresponding cardstock piece cut earlier. Add more tape as needed on the back side of the panel to keep the pieces together, especially in areas where more cuts will be made.
NOTE:
Take care when removing the die cut piece. Overlapping outlines may create small loose pieces that will need to be replaced into the panel and secured with tape from the back side of the panel.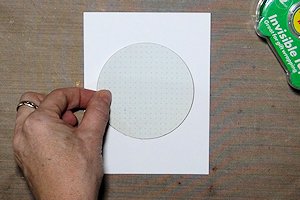
-
Step 5
Position the corresponding die from the next layer onto the panel. Cut, and remove the die cut piece.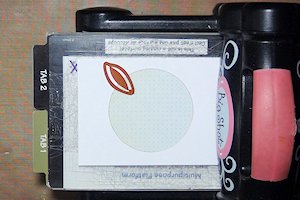
-
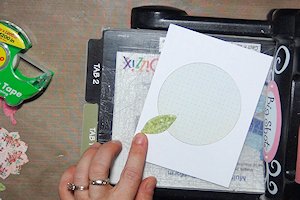
Replace the cut piece with the cardstock piece cut earlier, using tape on the back side of the panel to keep the inlaid piece in place.
-
Step 6
Repeat the step above for as many pieces as you have remaining, each time filling in the opening with a die cut shape and securing with tape on the back.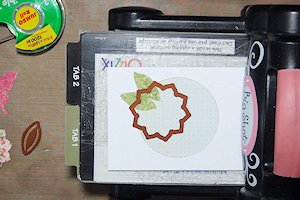
-
HINT:
If dies in a single layer do not overlap, more than one shape can be cut at once to save time.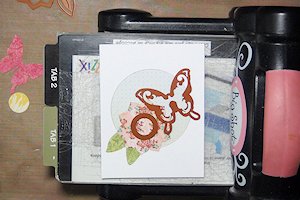
-
Step 7
Complete the inlaid design.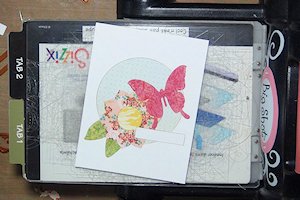
-
Apply adhesive to the entire back of the panel, making sure there is adhesive on both sides of each cut line.
Adhere the panel to a card base.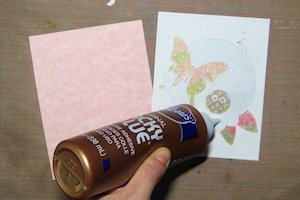
-
Step 8
Embellish and complete the card.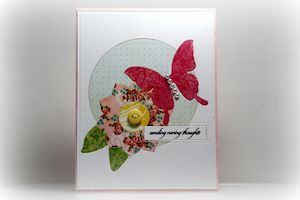
No comments:
Post a Comment