Monday, August 6, 2012

How to use color with Alcohol Markers


Alcohol Markers

by Kate Sanders
Learn to add depth by layering alcohol-based markers.

Supplies
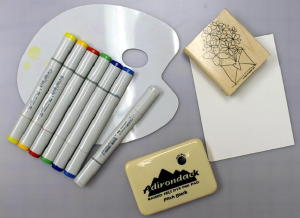
  • Stamps

  • White Card stock (Georgia Pacific used)

  • Black Dye Ink (Adirondack pitch black/Ranger used)

  • Copic Sketch Markers

  • Copic Colorless Blender Pen

  • Plastic Palette

Step-by-Step

  1. Step 1

    Stamp image using dye ink on card stock. Be sure ink is completely dry before coloring.
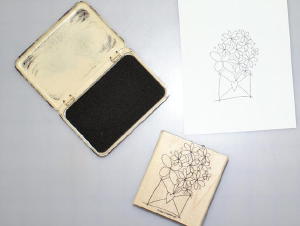
  2. Step 2

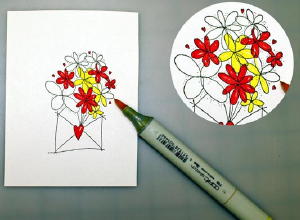
    Apply base coat color to flowers.

    Note: Do not fill in completely and leave some random white areas on several petals.
  3. Step 3

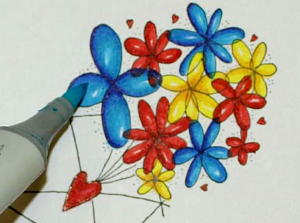
    Using a red marker that is slightly darker than your original base coat marker, outline the edges of the red flower petals.
  4. Step 4

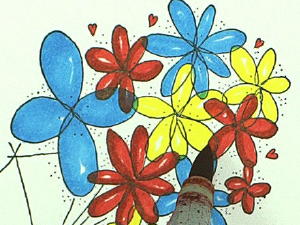
    Use the chisel end of an orange or red marker to place color on a plastic palette. Using the brush tip of the yellow base coat pen, pick up some of the red/orange color and use this to shade the edges of the yellow flowers. Repeat as necessary.

    Tip:
     Clean any residual color from the tip of the yellow marker by gently dragging it along a paper towel until all the red/org is removed.
  5. Step 5

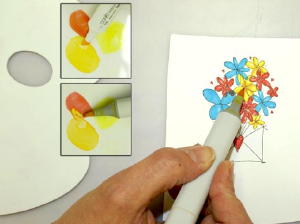
    Using a blue marker that is moderately darker than your original base coat blue color, outline along the edges of the blue flower petals.

    Then, using your original, lighter base coat blue marker, immediately color over the juncture of the two colors to fuse them together.

    Tip: Colors will fuse better if working quickly while ink is still wet. Therefore, work on one petal at a time. (e.g., do not outline everything first) 
  6. Step 6

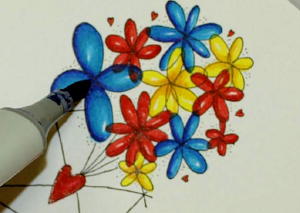
    Use the chisel tip of green and blue markers to place color on a plastic palette.

    Using the Copic marker blender pen, pick up green color and apply around flowers being careful not to touch flower petals.

    Clean blender on paper towel and repeat process using blue color to shade the envelope. 
  7. Step 7

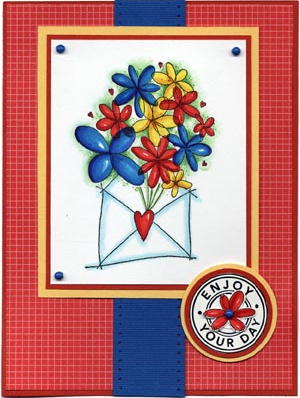
    When I teach I like to use sections of an image to illustrate different techniques. This sample covers three very basic coloring and shading techniques for those new to using alcohol-based marker pens. 
  8. Step 8

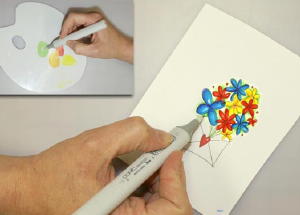
    Finished Card. 
Video!


Split  Coast Stampers

Free Art

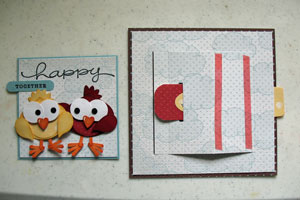
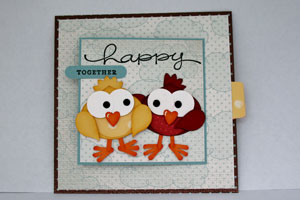
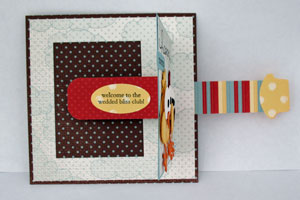
Slider Card


T-Slide Card

by Kim Score( Split Coast Stampers)
Create a slider card with a surprise message.

Supplies

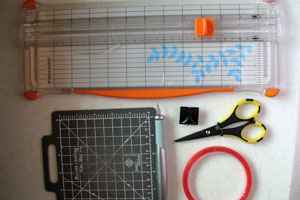
  • Paper cutter with scoring blade

  • Craft knife with cutting mat

  • Sticky Strip™ or other strong adhesive

  • 5 1/4" square of card stock, or heavy patterned paper (card base)

  • 5" square of card stock, or heavy patterned paper (card front)

  • 3 1/2" x 1 1/4" piece of card stock, or heavy patterned paper (Inside sliding piece)

  • 4" x 1" strip of card stock, or heavy patterned paper (T-Slide mechanism)

  • 4 1/4" x 1" strip of card stock, or heavy patterned paper (T-Slide mechanism)

  • Round tab punch or circle punch

  • Additional card stock, stamps, Ink and Embellishments to finish your card

Step-by-Step

  1. Step 1

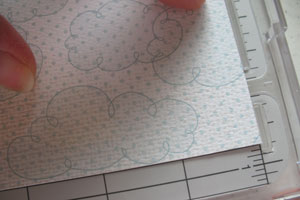
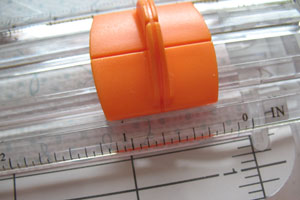
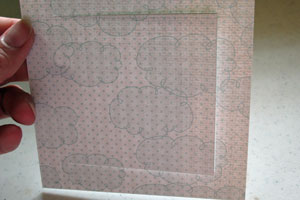
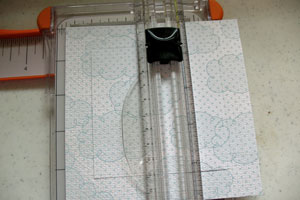
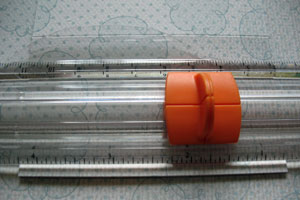
    To begin, you will be cutting a "U" into the inside of the card stock square at 3/4" from three sides of the square. To do this, line up the 5" piece of card stock at the 3/4" mark of the paper cutter. Cut from 3/4" to the 4 1/4" mark.
  2. Turn the card stock clockwise to another side and follow the same steps. Turn the card stock clockwise again, and follow the same steps. At this point, you will have 3 cut sides.
  3. Step 2

    Switch the blade on the paper cutter from the cutting to the scoring blade. Score the fourth side to complete the frame.
  4. Step 3

    Line up scored side of frame on the right side of cutting track (while the extended measurement arm of the cutter points to your left.) 

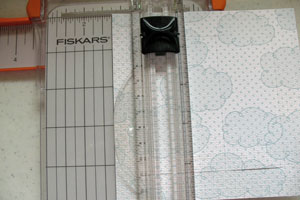
    Line up the left edge of the card stock at the 2 3/4" mark and score between horizontal cut lines (3/4" to 4 1/4").
  5. Move left edge of card stock to 1 1/4" and score again from 3/4" to 4 1/4".

    You should now have three scored sections on the inside of the frame. One 1/2" wide section adjacent to the cut side and two 1 1/2 wide sections.
  6. Step 4

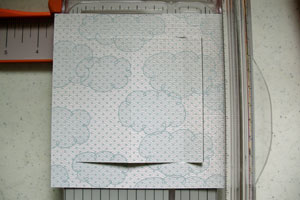
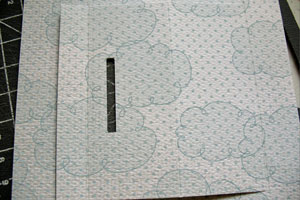
    Put the cutting blade back in your paper cutter. Place the scored side of the frame to the LEFT of the cutting track. Line up the left edge of the card stock at 3 3/8". Cut from 1 3/4" to the 3 1/8" mark.
  7. Slide the left edge of the card stock to 3 1/4". Cut the same slit as before.
  8. Step 5

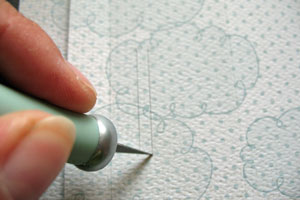
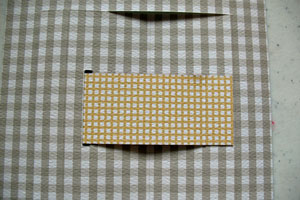
    Use a craft knife to cut away the section created by the 2 parallel slits.
  9. Step 6

    Score the 3 1/2" x 1 1/4" piece of card stock at 1/2". Add strong adhesive to the 1/2" scored end (right side up). 
    Stamp your greeting on the strip (if you don’t want your greeting to peek out when the card is closed, you will need to keep the greeting closer to the end with the score). 
  10. Step 7

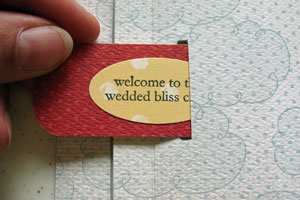
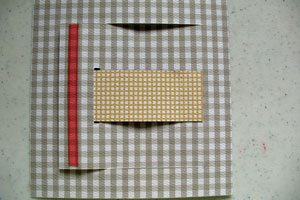
    With the right side facing up, slide the greeting strip into the front slit as shown.
  11. Turn the card stock over and attach the end of the strip at the score line of the frame.
  12. Step 8

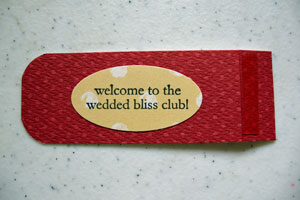
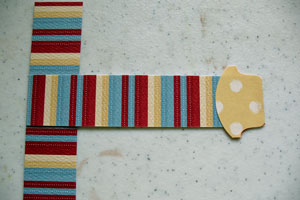
    Create a T-shaped slider by placing the 4" x 1" strip at the top and glue the 4 1/4" x 1" strip at the center. Attach a pull-tab at the end of the T-slide (sample uses the round tab punch, you can change that to a circle or scallop circle).
  13. Step 9

    Turn your 5” square piece of card stock over and add adhesive along the 1/2” score line as shown.
  14. Step 10

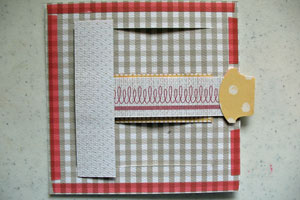
    Attach the T-slide by lining up the left edge of the slide at the score line (make sure the side you want to show is facing down, try stamping another greeting on the slider as well). 
    Put strong adhesive around the outer edges. Make sure to leave a small gap on each side of the pull tab for clearance.

    Note:
    To prevent the pull tab from catching the edge of the card stock when sliding back into place, add a thin dimensional or pop dot on each side of the pull tab before putting the backing piece in place. This will raise the card stock slightly so the tab can freely slide in and out.
  15. Step 11

    Attach slider card front to the 5 1/4” x 5 1/4" piece of card stock. Attach card front elements over the slider front on either the left or right section. Don’t attach to both sections, or the card won’t open properly.
  16. Step 12

    Your card is now finished.

Video!

Always

Dimensions 5.0 by 4.25
Embossed background with Cuddle Bug
Background cut at 4.00 inches
Hand colored in Flowers
Added Glitter Glue
Cut circle  is 1.50 inches with paper punch and layer


Sunday, August 5, 2012

Triple Stamping

Triple Stamping...here are the  how to do it

1. Cut 3 layers of cardstock that are graduated sizes. My square layers are 4", 3", and 2". You can cut them any size or shape you want. Cut matting layers for each layer, too, in order to cover up the gap you will get on the bottom two layers. 

2. Line them up, the smallest on top in the middle and work down. I have mine evenly spaced but you can get creative. It may help to lightly tape them together so they don't move. 

3. Choose a stamp that will cover over all three layers or use several stamps...what ever works for you. Stamp over all the layers...wait a minute or so to divide the layers so you don't smear the ink.

4. Now, adhere the matting to the layers and adhere the layers together. 

5. Have fun!!! Article SplitCoast Stamper and Picture

Easel Card and mine made with cricut

Easel Card


by Beate Johns

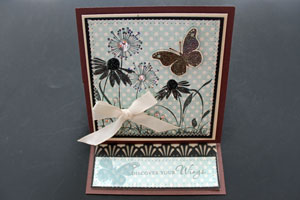
Create a card with a built-in easel.

Supplies

  • One 4 1/4" x 8 1/2" piece of cardstock (look for alternate measurements under variation)
  • One 4 1/4" square piece of cardstock
  • Scor-Pal™, or other scoring tool
  • Scor-Tape™, or other strong adhesive
  • Additional cardstock for card inside and card front
  • Stamps, Taylored Expressions Discover your Wings used here
  • Ink and Embellishments

Step-by-Step

  1. Step 1

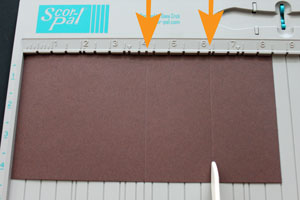
    Score the 4 1/4" x 8 1/2" piece of cardstock at 4 1/4" and 6 3/8".

    Hint:
    On a Scor-Pal, the 6 3/8" measurement is marked with a dot on the upper guide.
  2. Step 2

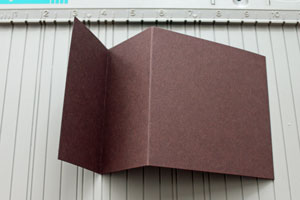
    Prefold all score lines.

    First fold the card in half, then fold the second score line (6 3/8") opposite from the 4 1/4" score line.
  3. Step 3

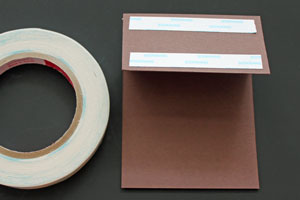
    Place cardstock on table with the 4 1/4" side down.

    Add Scor-Tape to the 2 1/8" x 4 1/4" section cardstock that is facing up.
  4. Step 4

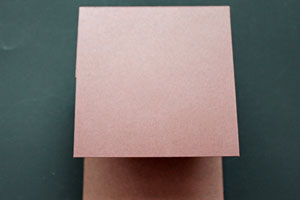
    Remove the Scor-Tape liner and adhere the 4 1/4" cardstock square to the card base.

    Line up the top of the square with the top of the 2 1/8" x 4 1/4" section.

    This creates the easel card base.
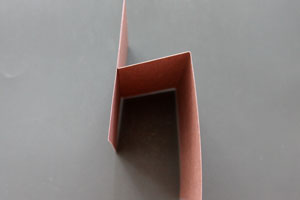
  5. Side view
  6. Step 5

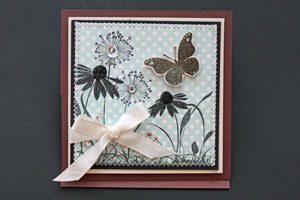
    Decorate the card front.
  7. Step 6

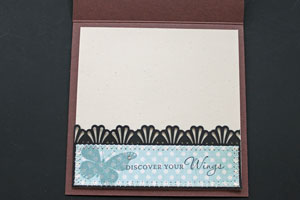
    Decorate the card inside.
  8. To make the easel card stand up by itself, add an embellishment or an extra layer (for this sample, it's the punched layer) the inside of your card. This that will keep the card front from closing.

    It is best to have that embellishment or layer at least 1/3" into the card from the bottom up.


Variations

  1. Regular card size (4 1/4" x 5 1/2")
    Vertical card
    Start out with a 4 1/4" x 11" piece of cardstock and score at 5 1/2" and 8 1/4". Your card front piece will measure 4 1/4" x 5 1/2.
    Horizontal card
    Start out with a 5 1/2" x 8 1/2" piece of cardstock and score at 4 1/4" and 6 3/8". Your card front piece will measure 4 1/4" x 5 1/2".

    Other card sizes
    You can make any card size into an Easel card.
    Your Easel base will measure two times the height of the card front.
    Example:
    For a 3" x 6" card start out with a 6" square for the easel base. Score at 3" (height of finished card) and 1 1/2" ( 1/2 of height of card).
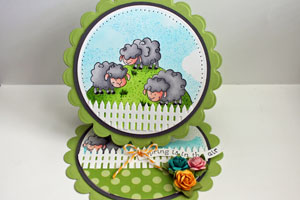
  2. Circular Easel Card
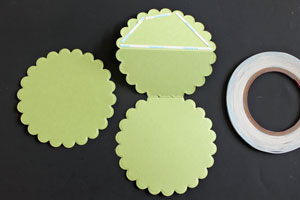
    - Cut a circular card base out with die templates. To do that, fold your cardstock in half, and line up the side with the fold so that part of that fold won't be cut.
    - Score one of the circle card sides in half and fold the other half up.
    - Add adhesive to the folded up 1/2 circle.
    - Adhere another circle shape, cut with the same die you used to cut the card base, to the 1/2 circle.
  3. Article from SpiltCoast Stampers

  4.  Used Love Struck cartridge for 2010
    Sweethearts from Love Struck cut at  3.00
    Used wall decor  and more cartridge to cut corners with
    They were cut at 1.00 and cut four
    Embossed back ground
    Pearls were added
    Gemstone
    Liquid Pearls
    Glitter
    Shaped for stamping came Sweet Hearts Cartridge
    Shape cut at 3.00
     

Joyful Birthday!!!

Dimensions 5.50 by 4.25
Background cut at 5.50 by 4.25
Embossed with Cuttle Bug Folder
Cartridge shape at 3.00 Accent Essentials
Frame cut at 2.50 Accent Essentials
Stamped truck from Classic Truck Set from stampin up
Colored Markers on Truck
Stamped Saying on  Paper