Sliding Pop-Up Card
by Kim Score
Create a card that moves, pops and stands all at once with this sliding pop-up technique.
Supplies
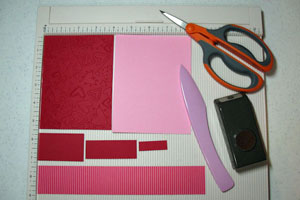
- Score board and bone folder, or scoring blade for paper cutter
- Strong adhesive
- 1" Circle punch
- One 5 1/2" x 4 1/4" piece of heavy cardstock for card base
- One 5 3/8" x 4" piece of heavy cardstock for pop-up back
- One 1 1/2" x 9" piece of patterned paper for sliding wrap
- One 1 1/2" x 2 1/2" piece of heavy cardstock for pop-up front
- One 1" x 2 3/4" piece of heavy cardstock for back pop-up mechanism
- One 1/2" x 1 1/2" piece of heavy cardstock for front pop-up mechanism
Step-by-Step
Step 1
Stamp or emboss pop-up back as desired.
Score the following pieces as follows:
5 3/8" x 4" - score at 1 1/2" on long side
1 1/2" x 2 1/2" - score at 1/2" on long side
1" x 2 3/4" - score at 1/2" on each end
1/2” x 1 1/2” - score at 1/2" on each end
Apply adhesive below score lines. For 1" x 2 3/4" piece, tape one end then flip to other side and tape other end.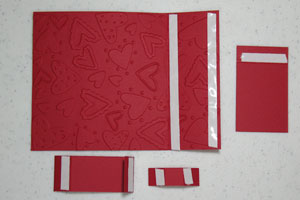
Step 2
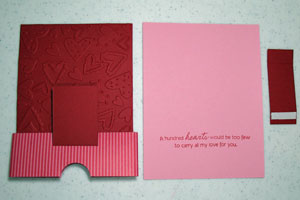
Attach sliding wrap at bottom of pop-up back.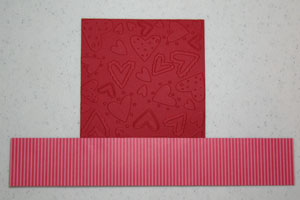
- Attach pop-up front piece on score line of pop-up back.
Attach front pop-up mechanism at score line of pop-up front piece.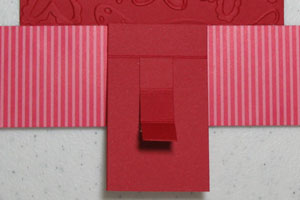
Step 3
Fold front pop-up mechanism towards score line of pop-up back.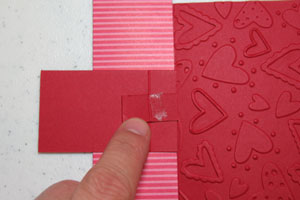
Step 4
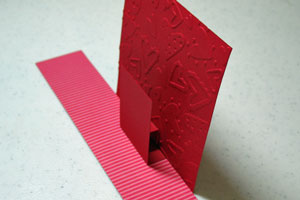
While holding pop-up mechanism in place, fold pop-up back forward to adhere to pop-up mechanism.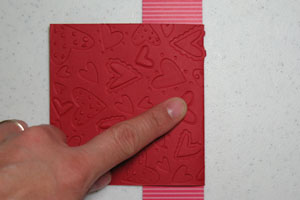
- Pop-up front should now be assembled as shown.
Step 5
Fold down flat and apply tape to one end of wrap. Place card base behind pop-up back with bottom edges aligned. Turn over and adhere wrap piece in back (don’t stick to card base!). Wrap should be snug but allow card to lay flat.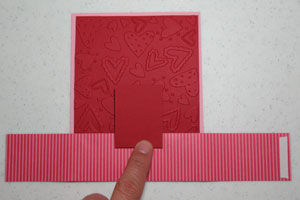
Step 6
Slide card base out from wrap and stamp greeting about 1” from bottom. Punch through pop-up back piece as shown.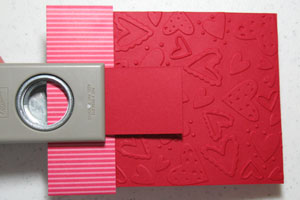
Step 7
Adhere back pop-up mechanism 1” from edge of card base and lay flat.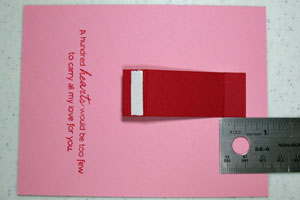
Step 8
Slide wrap piece onto card base. Line up sliding wrap at bottom of card base and then fold flat, adhering to back pop-up mechanism.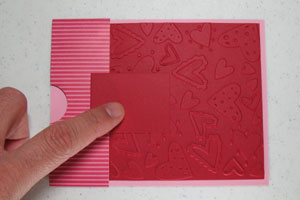
- Add stamped or punched pieces to front of pop-up.

Step 9
Your image will pop up when you pull on thecard base. From Spilt Coast Stamper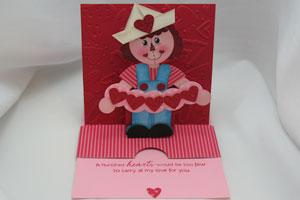
HELLO, I like this, I bookmarked ti to try at a later date:)
ReplyDeletecathyplus5.blogspot.com