Die Cut Swing Card
by Norma Lee
Create a swing card using a shape or label die.
Supplies
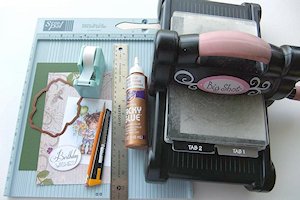
- Cardstock cut to 8 1/4" x 5 1/2"
- Designer paper cut to 8 1/4" x 5 1/2"
- A shape die template (Spellbinders Labels Five used here)
- Die cutting machine
- Scoring board
- Removable or low-tack tape (3M Scotch used here)
- Pencil, ruler and craft knife (or paper trimmer)
- Adhesive (craft glue used here)
- Other supplies as needed to finish the card
Step-by-Step
-
Step 1
On the 8 1/4" x 5 1/2" cardstock, lightly pencil 2 vertical lines at 2 5/8" and 4 1/4" (white pencil used here for better viewing). Set cardstock aside.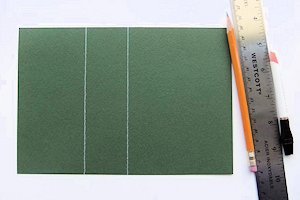
-
Step 2
On the 8 1/4" x 5 1/2" designer paper, lightly pencil 2 vertical lines at 2 3/4" and 4 1/8" and a horizontal line midway at 2 3/4".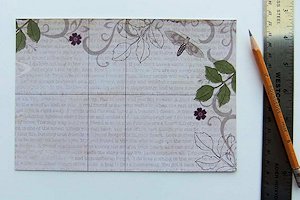
-
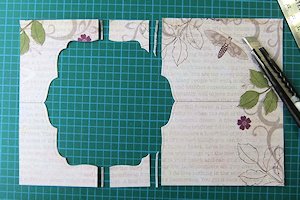
Step 3
Center the die around the cross formed by the horizontal line and the first vertical line as shown. Secure in place with 3 or 4 pieces of removable tape.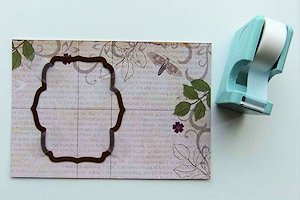
-
Step 4
Die cut the paper. DO NOT remove the tape pieces or the die itself, but remove the die cut piece from the center leaving a window on the designer paper.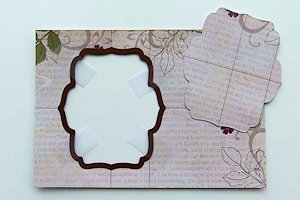
-
Step 5
Place the designer paper exactly on top of the cardstock, lining up the paper edges. Secure in place with the removable tape pieces that are already there.
-
Step 6
With the die blade-side down, place the papers between the two cutting plates. Ensuring that edge of the top cutting plate is lined up along the 2 5/8" vertical line (drawn in Step 1 above) as shown, run the sandwich through the die cutting machine.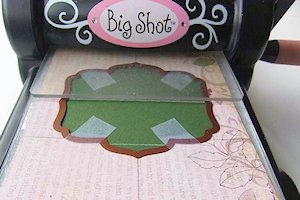
-
Step 7
Now turn the papers around 180 degrees and repeat Step 6, this time with the edge of the top cutting pad up lined up along the 4 1/4" vertical line.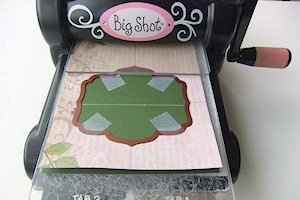
-
Step 8
Remove the die and tape pieces from the papers.
Place the cardstock upside down on the scoring board and score at 2 3/4" as shown, from the paper edges to the die-cut lines only. DO NOT score in the middle part.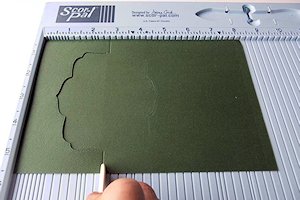
-
Step 9
Turn the cardstock right-side up and score at 4 1/8", from the paper edges to the die-cut lines only. DO NOT score in the middle part.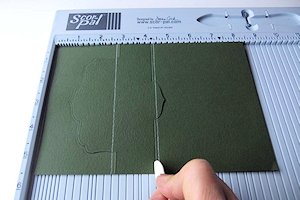
-
Note:
If using the Scor-Pal, place the left edge of the paper at the 1/8" mark and score at 4 1/4" as shown.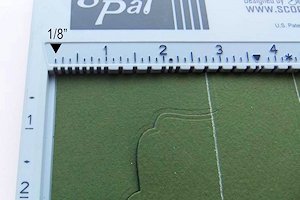
-
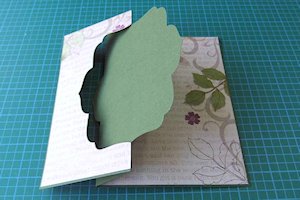
Step 10
Valley-fold and mountain-fold the cardstock as shown.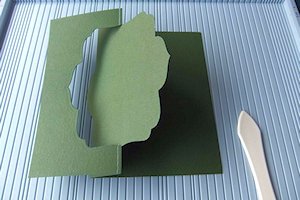
-
Step 11
To create a narrow border around the outside of the designer paper, trim off about 1/16" from each of the four sides using a craft knife and a ruler, or a paper trimmer.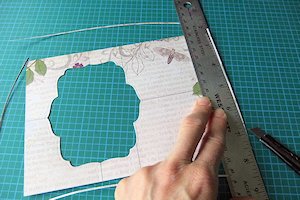
-
Also trim at both sides of the vertical lines as shown.
-
Step 12
Glue the designer paper pieces to the cardstock. Erase all pencil lines.
TIP:
Any sticky residue from the removable tape can also be rubbed off with the eraser.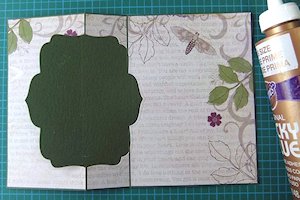
-
This is how the card base should look when closed.
-
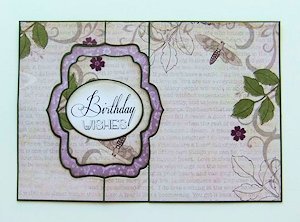
Step 13
Adhere images and/or sentiments to both sides of the swing panel.
-
-
Step 14
Embellish as desired to complete the card.
-

Video!
From Spilt coast stampers.com
No comments:
Post a Comment